

The camera finds and straightens a phone screen
First day: the Insta360 GO 3S camera came online, and our code found a phone on the desk, measured where it lay and straightened its screen to read it. This is the vision side of an arm that will tap a phone with a stylus.
 Open the photo large
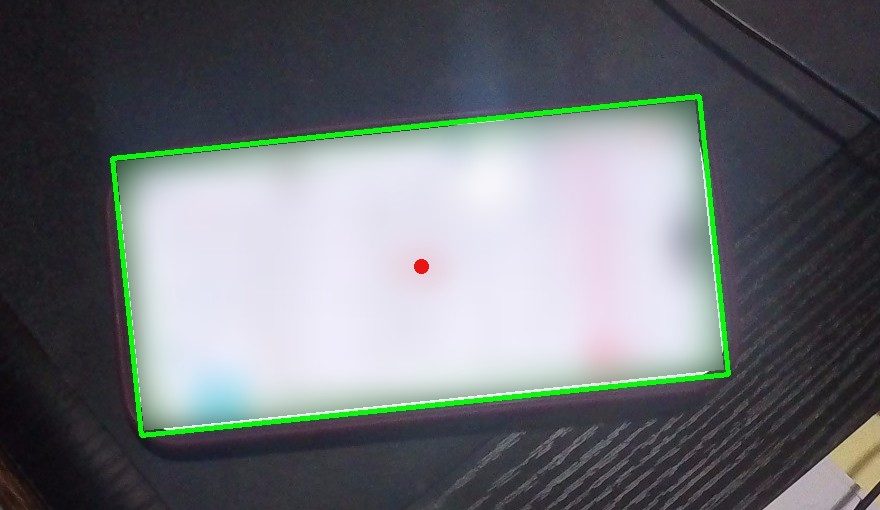
Our code found the phone by itself: the green outline is the screen it detected and the red dot is the centre point an arm would aim for. The screen is blurred here.
Photo: Robot camera + OpenCV, screen blurred
What we did
- Brought the Insta360 GO 3S online as a USB webcam: 30 fps in every mode, with automatic exposure, white balance and focus that our code cannot adjust. Wrote
vision/camera.py, which opens a camera by name, and the first tools:tools/snap.pysaves a frame,tools/preview.pyshows a live view andtools/camera_check.pylists cameras and measures the frame rate. - Put a phone under the camera. Our code found its screen by itself and measured its position and size in pixels and its tilt in degrees.
- Cut the screen out of the frame and turned it upright with a perspective warp. The small sideways text became easy to read, so 1080p has enough detail at this camera height.
- Identified the arm on order from two product photos by its servo labels (HTS-25L, LX-225, HTS-16L): most likely the Hiwonder LeArm AI with an ESP32 controller. Its servos report their position, it takes commands from a PC over USB, and it has built-in inverse kinematics, the math that turns a target point into joint angles.
- Planned how the arm could work a touchscreen phone: the phone in a fixed holder, a grounded stylus in the gripper, the camera rigidly mounted above, the arm driven from the PC, and calibration by tapping a grid of dots. Buttons and swipes look doable; tiny targets look unreliable.
- Tested a cloud vision model on the same images. It found the phone, with a box that matched our own outline, and on the straightened screen it located both buttons we asked about, in 0.14-0.26 s per request.
- Wrote the project README with a six-step roadmap: camera bring-up, camera in position, arm bring-up, camera-to-arm calibration, first pick and place, then grow it into a product.
What we learned
- Perspective warp
- A camera sees a phone lying at an angle as a rotated, skewed shape. We picked out the bright screen with a brightness threshold, took its outline as a rotated rectangle and mapped its four corners onto an upright one. Small sideways text became readable, and finding small buttons worked better on this image than on the raw frame.
- Camera-to-arm calibration
- Our code measured the phone in camera pixels: the centre of its screen was at pixel 1021, 296. The arm needs centimetres, so we first have to calibrate the lens, which bends straight lines, and map the table. For the phone, the plan is for the arm to tap a grid of dots in a drawing app while the camera sees where each dot lands.
- Resolution and field of view
- Changing a webcam's resolution can change what it sees, not just how sharp the picture is. On the GO 3S, 720p is the full 1080p view scaled down, but 360p is a 1.5x zoomed crop of the centre, so a pixel position means something different in each mode.
- Grounding a capacitive stylus
- A phone's capacitive touchscreen senses the small electrical effect of a finger. A stylus that no hand is holding is often ignored, so people who automate phones run a thin ground wire from the stylus to the arm. Our setup plan includes one.
- Degrees of freedom
- Each joint that moves on its own adds one degree of freedom. Tapping a flat screen needs only three axes (across, along, and up and down), so robots built only to tap phones are often pen-plotter or delta designs, which are more precise on a flat screen. The LeArm's six servos, one of them the gripper, are more than enough, and they also let it pick things up and move them.
Numbers
| Camera modes (Insta360 GO 3S, MJPEG) | 1080p, 720p, 360p, all 30 fps |
|---|---|
| 360p view | 1.5x zoomed centre crop |
| Phone screen centre in the frame | x 1021, y 296 px (1920 x 1080 frame) |
| Phone screen size in the frame | about 590 x 278 px |
| Phone tilt in the frame | about 6 deg |
| Cloud vision model answer time | 0.14-0.26 s per request |
| Arm servo positions | 0-1000 = 0-240 deg (0.24 deg per step) |
Problems and fixes
A dark object close to the lens blocked the bottom middle of the view, and the camera was not rigidly mounted, so the view shifted between captures.
Fix: Not fixed yet. Before arm work starts, move the object or the camera, and mount the camera rigidly above the workspace.
A bright white spot hid part of the phone screen, and the smallest text was soft.
Fix: Not fixed yet. Next time, put the phone in the middle of the view, closer to the lens, and light it so the glass does not reflect.
On the raw, tilted camera frame, the cloud vision model put the box for one small button one icon off.
Fix: Straighten and crop the screen before asking where small targets are. On the straightened screen it found both buttons.
A banner at the top of the screen confused a question about the first item on the screen, and the model answered wrongly, with low confidence.
Fix: Rewording the question to exclude the banner fixed it. Lesson: word questions literally, and act only on confident answers.
Two bugs in the new camera tools: a bad
--sizevalue printed a Python traceback, andtools/preview.pylost its status lines when it was stopped.Fix: The argument parser now checks the size and prints a short error, and preview flushes each status line as it prints.
Next
- When the arm arrives, drive it from Python over USB using Hiwonder's published command format.
- Measure the arm's reach, payload and accuracy, which Hiwonder does not publish.
- Ground the stylus, fix the phone in a holder and calibrate the arm to the screen by tapping a grid of dots.
- Clear the camera's view and mount the camera rigidly above the workspace.